Virtual Router functionality is an integrated part of Cloud adore powerd by CloudSigma’s cloud platform that offers customers an effective Network-as-a-Service tool accessible via the user interface and API. A high level of granularity provides for a redundant and protected network configuration, deep level of control of access, and set up of preferred connections and routing. The Virtual Router tool grants unlimited virtual domains, firewall policies and registered endpoints, as well as a rich set of additional features. The Virtual Router tool allows customers to build very complex network solutions. Customers are also able to manage virtual network deployments on VMware avoiding the need for VMware’s NSX hypervisor.
Customers can use the virtual router functionality to define and manage traffic flows between any two networks they wish. A multi-tiered networking topology can be defined within the cloud by creating multiple virtual routers. The following diagram shows the first Virtual Router controlling the traffic passing between the Internet and Private Network A, while the second Virtual Router controls traffic between Private Network A and B. Each virtual router can be deployed in a redundant way to ensure resiliency by utilizing dedicated, reserved underlying hardware capacity. This ensures stable and reliable performance as well as independence between any two network pairings.
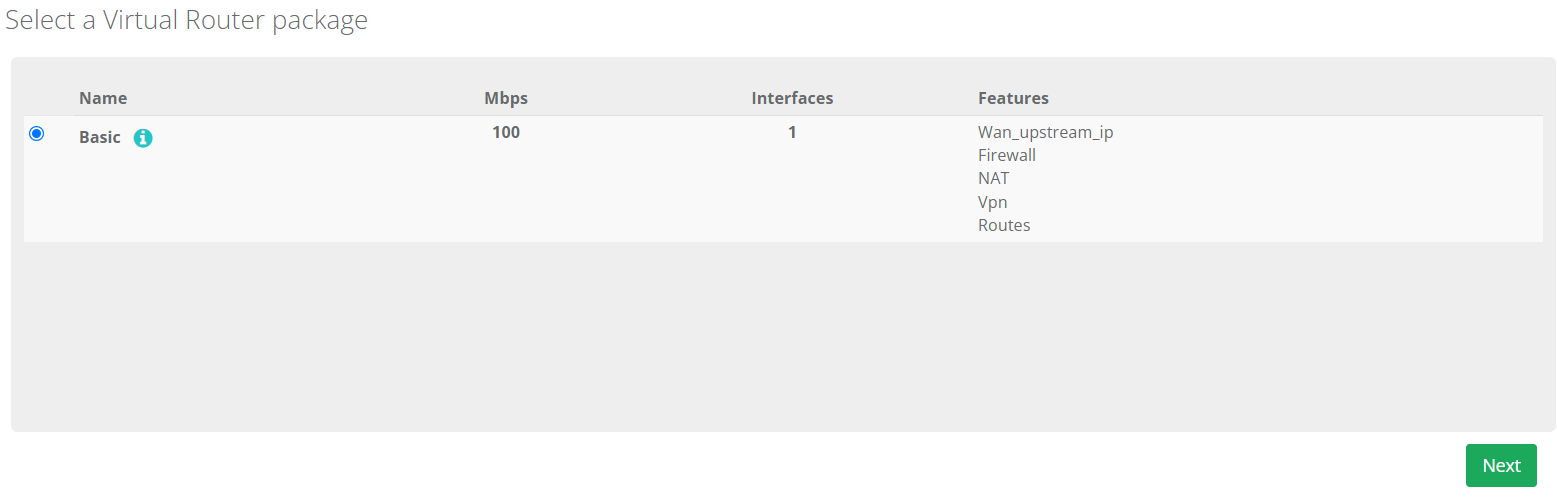
Step 1: Select a Virtual Router package
Navigate to the Virtual Router page and select a package.
Note: Only the Basic package is available at this moment. This tutorial will be updated once the Premium and Enterprise packages have been added.
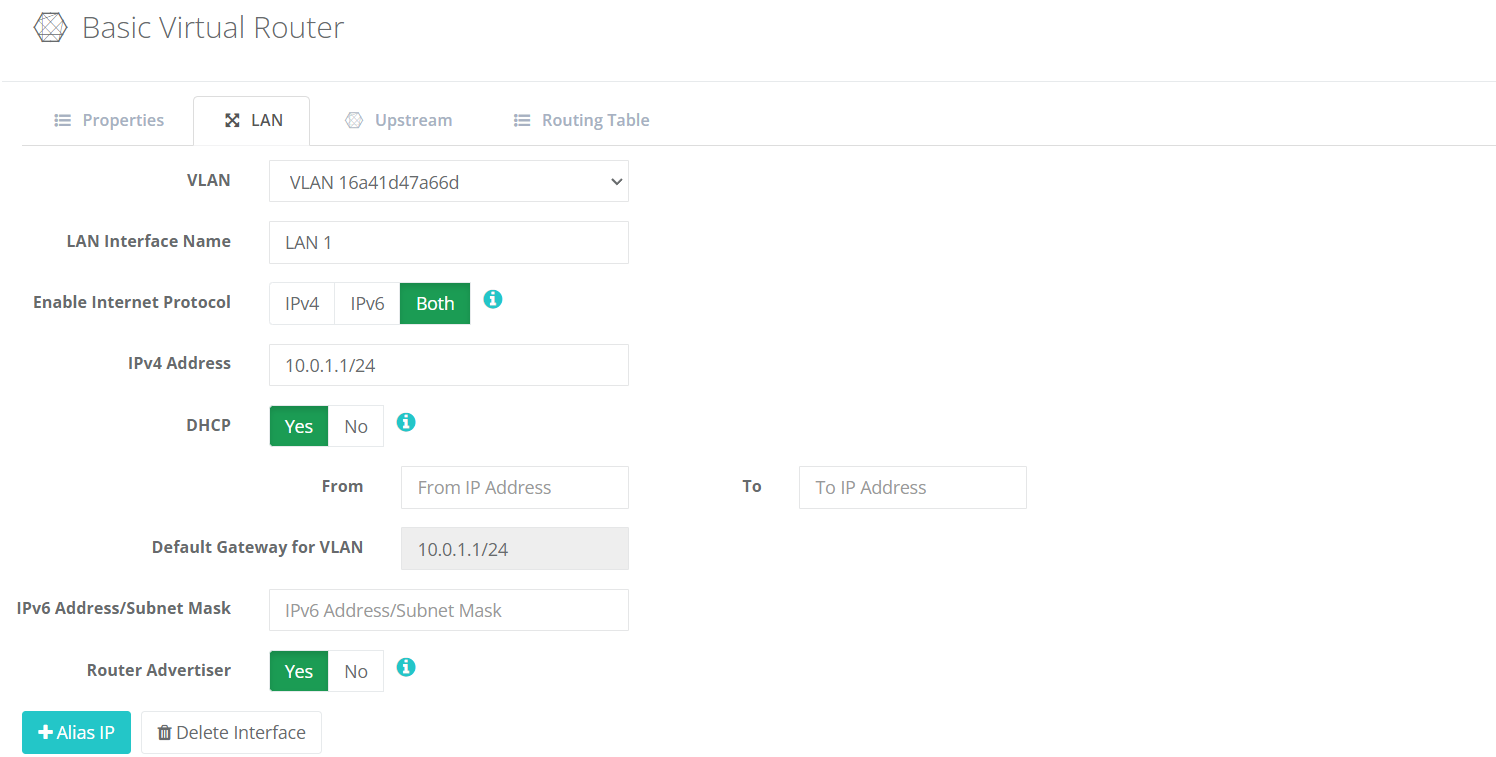
Step 2: Select the network to manage
On the LAN tab you can select the VLAN and enable the preferred internet protocol (IPv4, IPv6, or both). You can turn on DHCP, which is a service that enables computers to request IP addresses and networking parameters automatically from selected VLAN of Virtual Router’s LAN Interface. You can also turn on Router Advertiser, which sends router advertisement packets to the specified interfaces in order to get automatic IPv6 addresses.
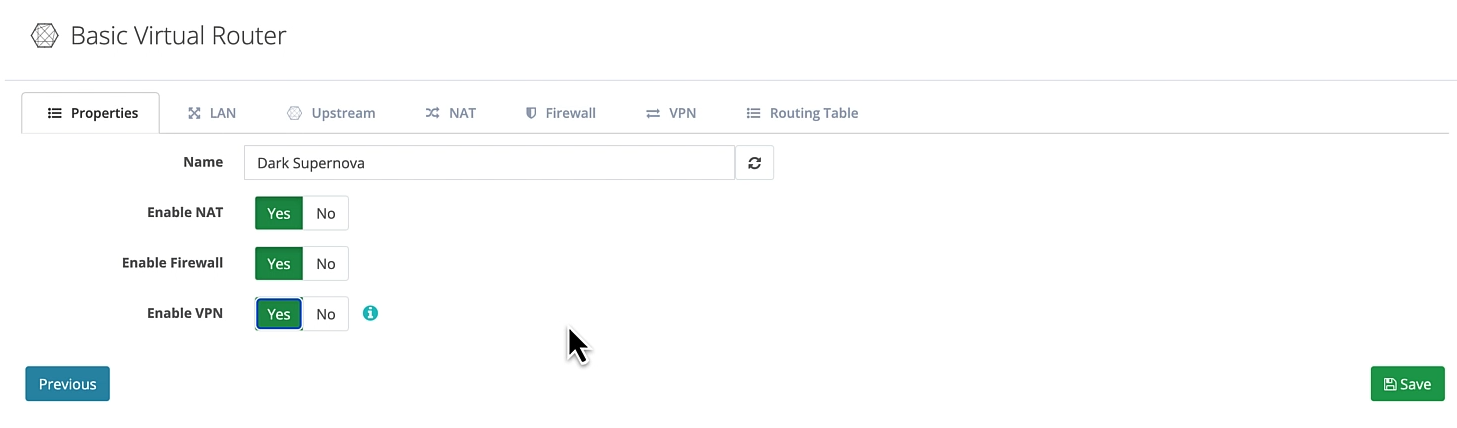
Step 3: Properties tab
Next, you can return to the properties tab and enable Network Address Translation (NAT), which will allow you through IPv4 to have your service publicly exposed using the routers IP address. You can enable a firewall to create a perimeter around the machines. You can also create a VPN connection so you can connect into the private network via VPN so you don’t have to use public internet.
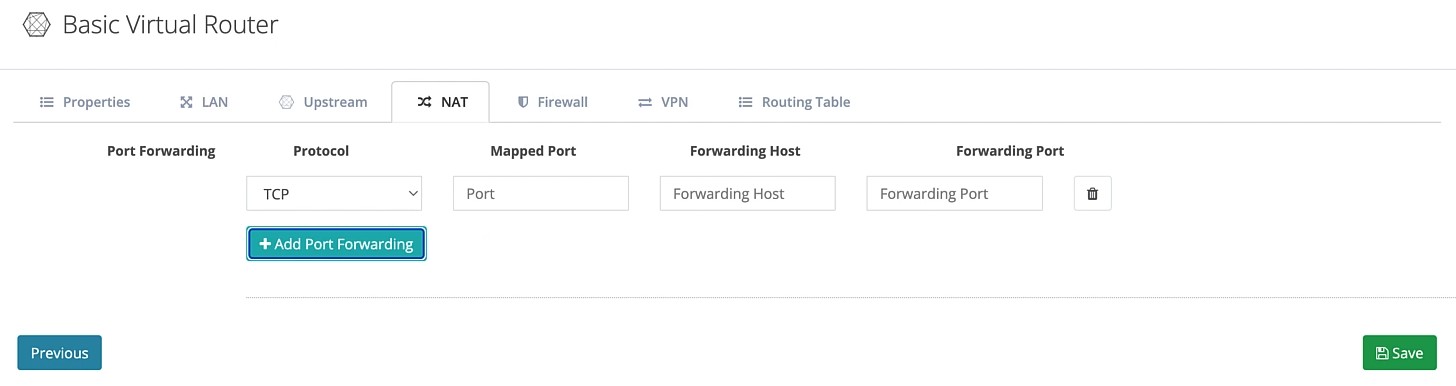
If you select all three, you will notice some new tabs pop up (NAT, Firewall, VPN). If you go to the NAT tab, you can setup port forwarding rules.
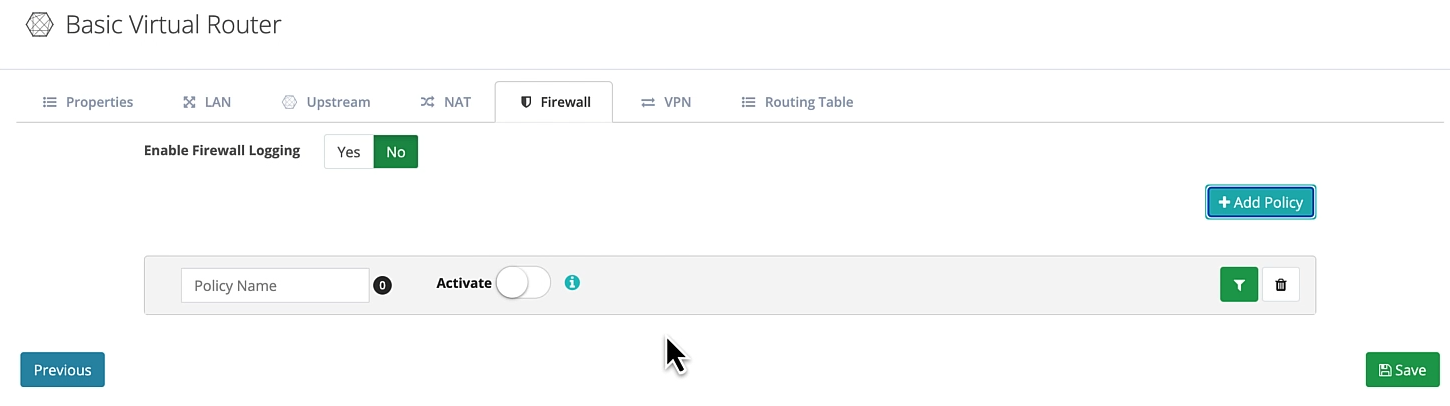
In the Firewall tab you can create new policies and the rules within them, as well as turn on logging.
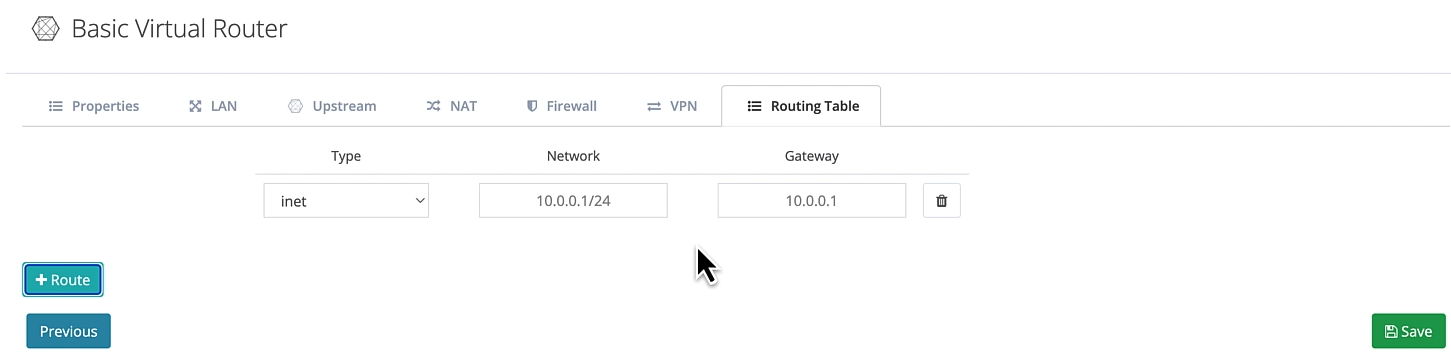
In the VPN tab, you will be able to configure the VPN once it’s active. In the Routing Table tab you are able to setup custom routing.