This tutorial will focus on enabling two-factor authentication in the Cloud Adore WebApp powered by Cloud Sigma.
Two-factor authentication (2FA) is an additional layer of security that requires users to provide two forms of authentication to access their accounts.
The importance of 2FA lies in the fact that passwords alone are often not enough to protect accounts from being hacked. Passwords can be stolen or guessed, and many people reuse passwords across multiple accounts, leaving them vulnerable if one of their passwords is compromised.
By requiring a second form of authentication, 2FA adds an extra layer of protection against unauthorized access to accounts. Even if a hacker manages to obtain a user’s password, they would also need to have access to the user’s phone to complete the authentication process.
Fortunately, 2FA is very easy to set up on Cloud Adore as the following tutorial will demonstrate. Therefore, it is something we do recommend all customers do as soon as they login for the first time.
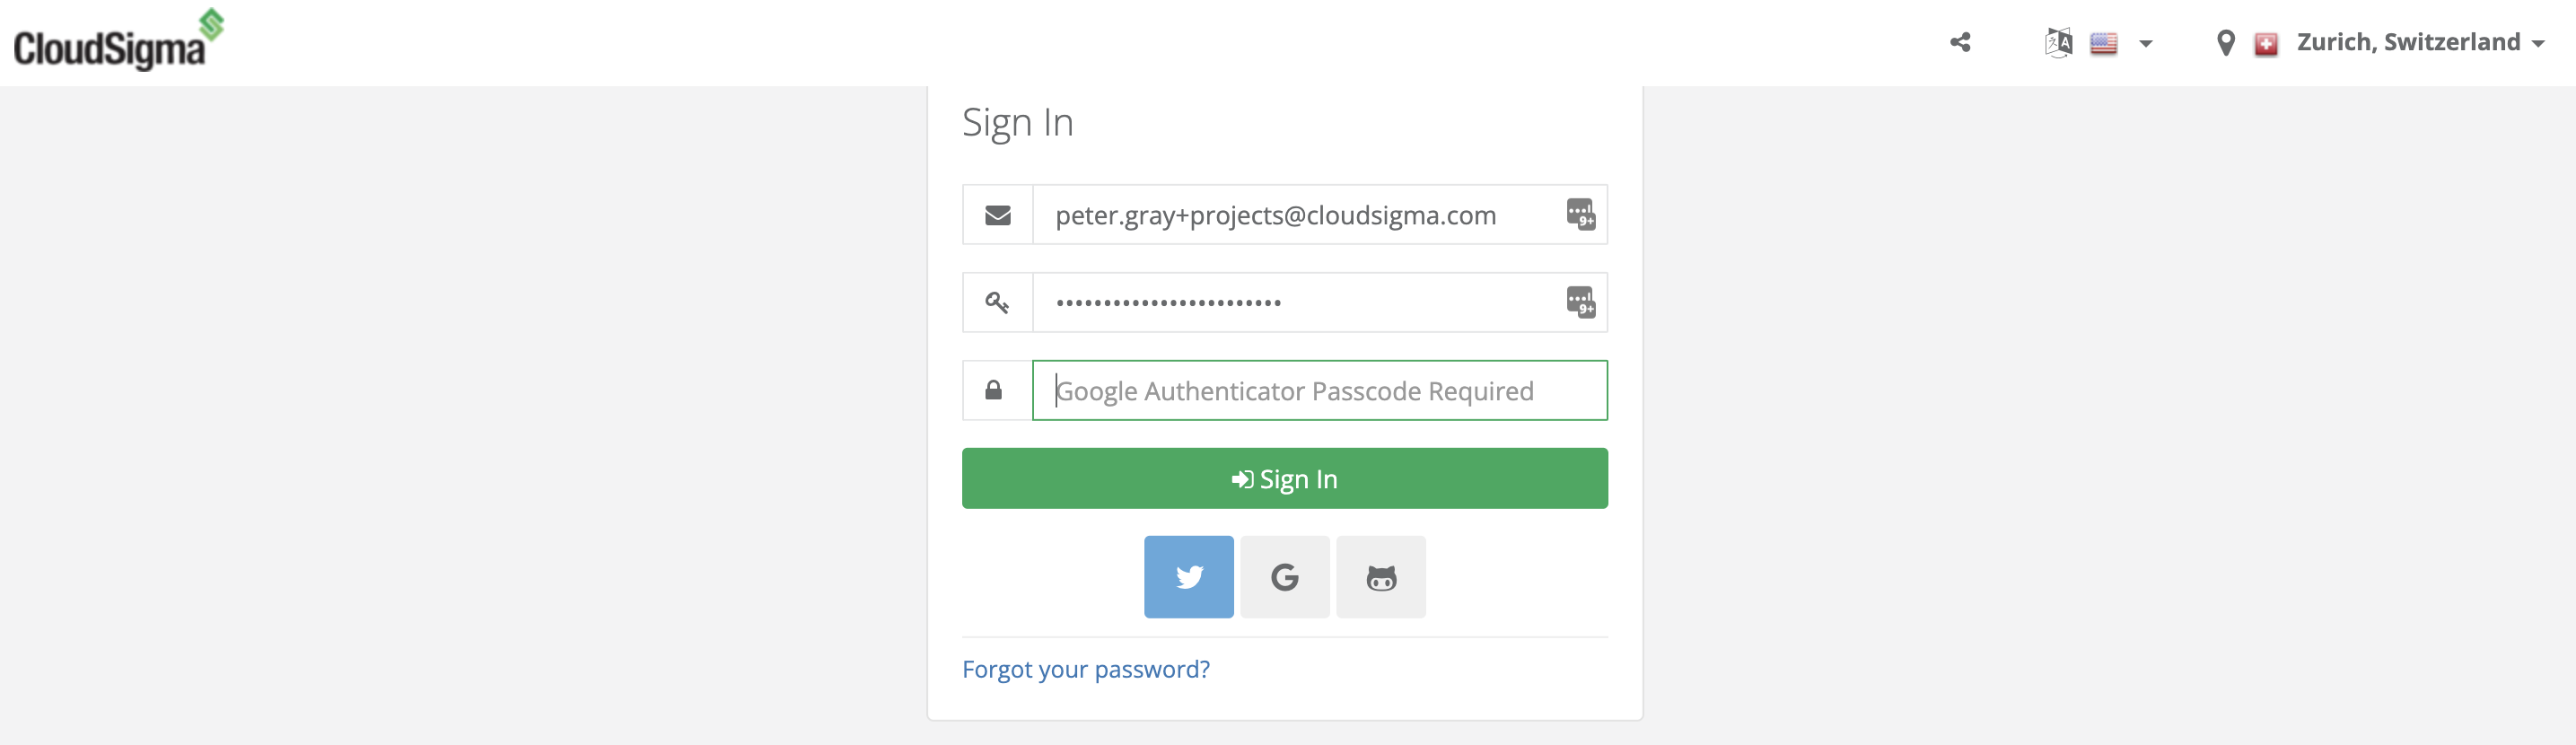
After login in to your account, you will navigate to the access and security section and click on two-factor authentication.
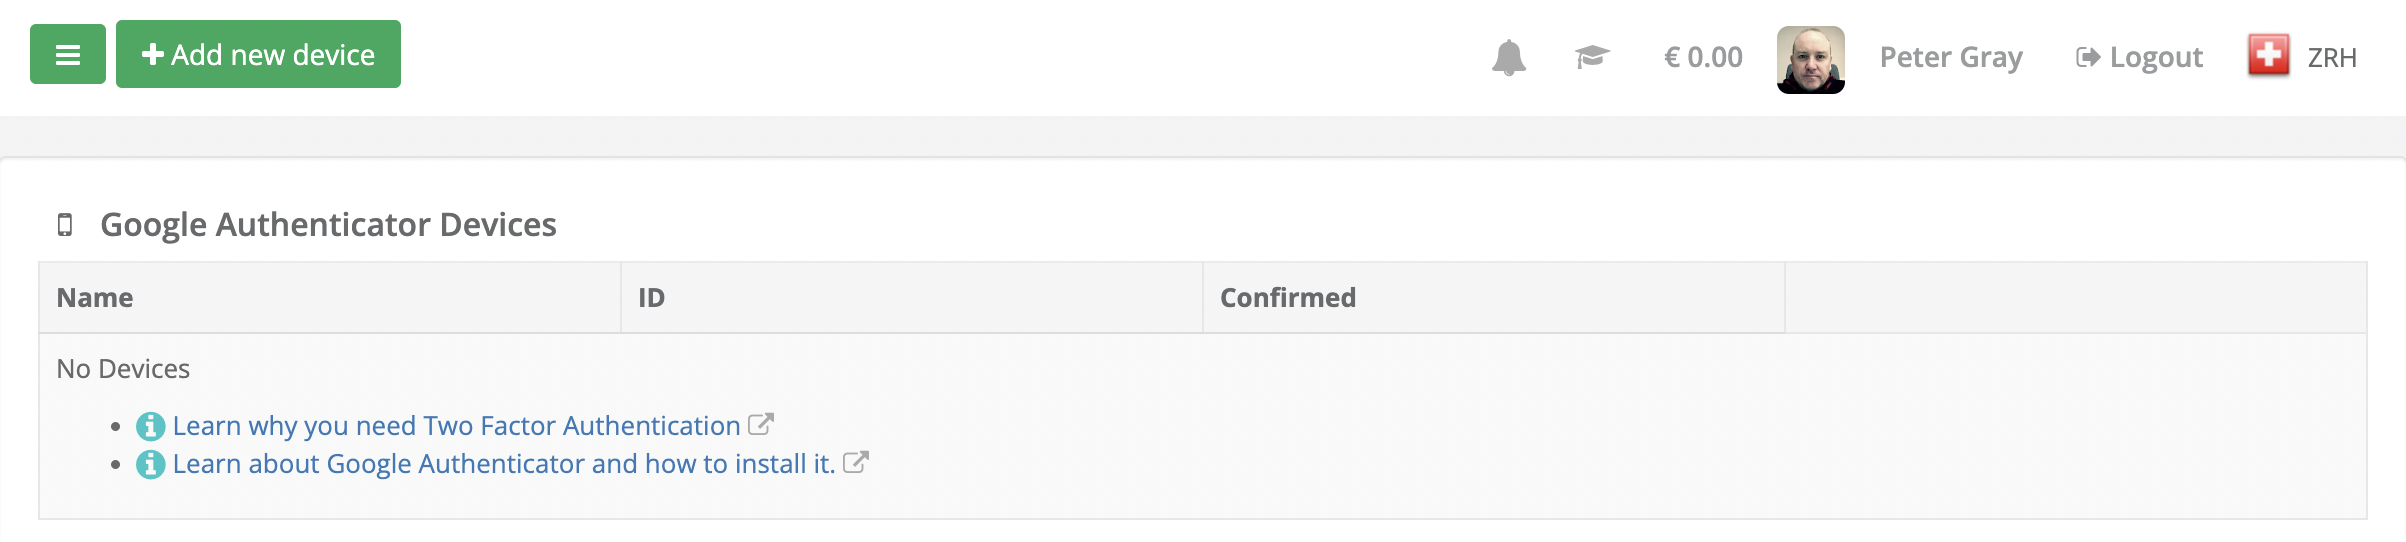
If you’re doing this for the first time, you won’t have any devices added yet. However, even if you did, it’s still possible to add new devices. This is useful for allowing access to other team members or simply because you’re using multiple mobile devices.
To get started, I’ll click on the Add New Device button. In this case, I’m going to add my mobile phone.
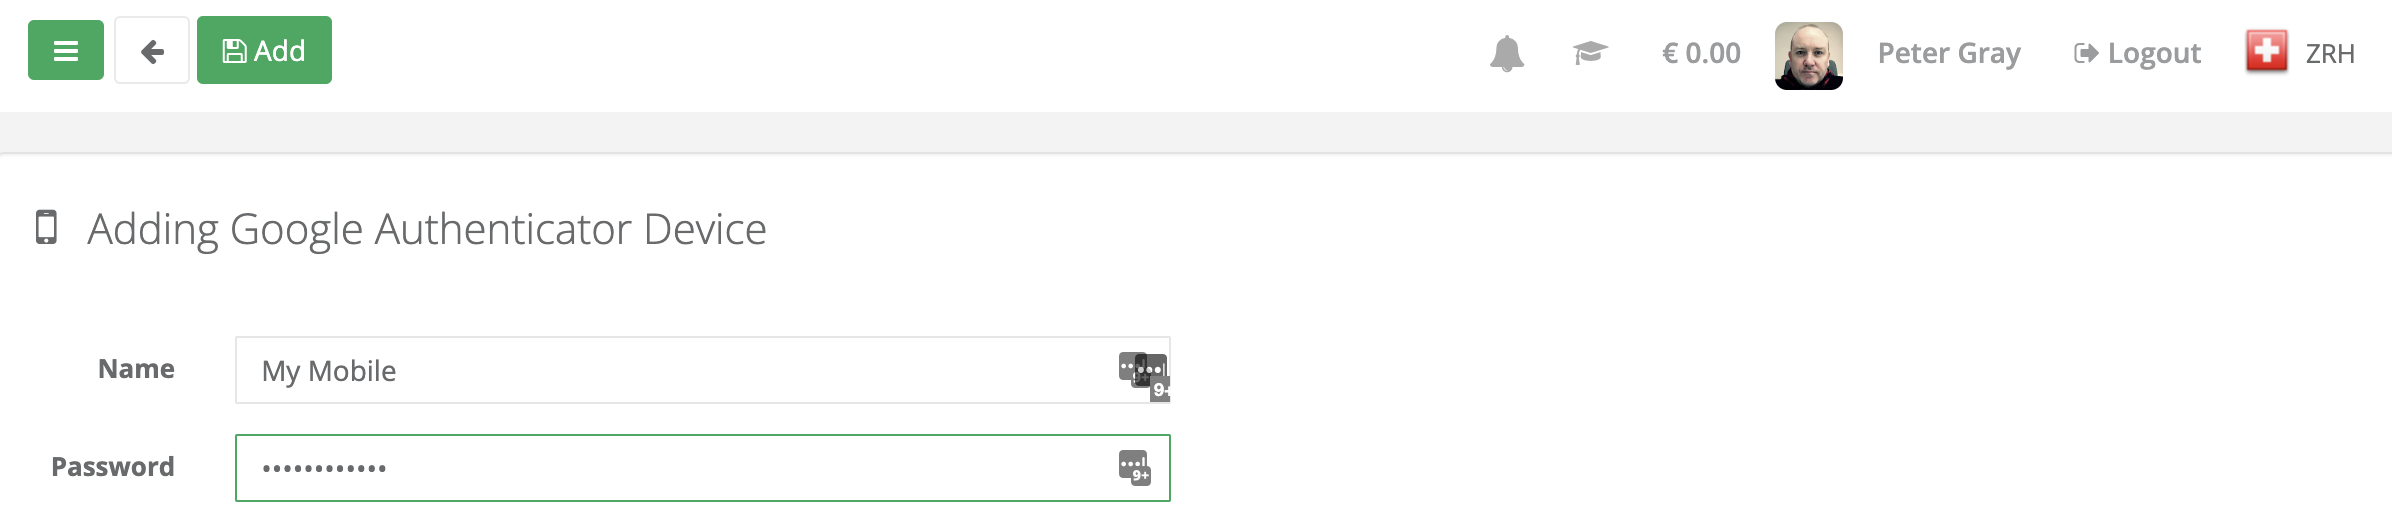
Now I’ll give the device a name. Since I’ll be using my mobile phone, so I’ll call it “My Phone”. I’ll enter my account password and click “Add”.
It’s important to note that activating 2FA secures all API calls against your account. If you are using our API directly (not only through the WebApp) then you will need to implement machine-to-machine 2FA.
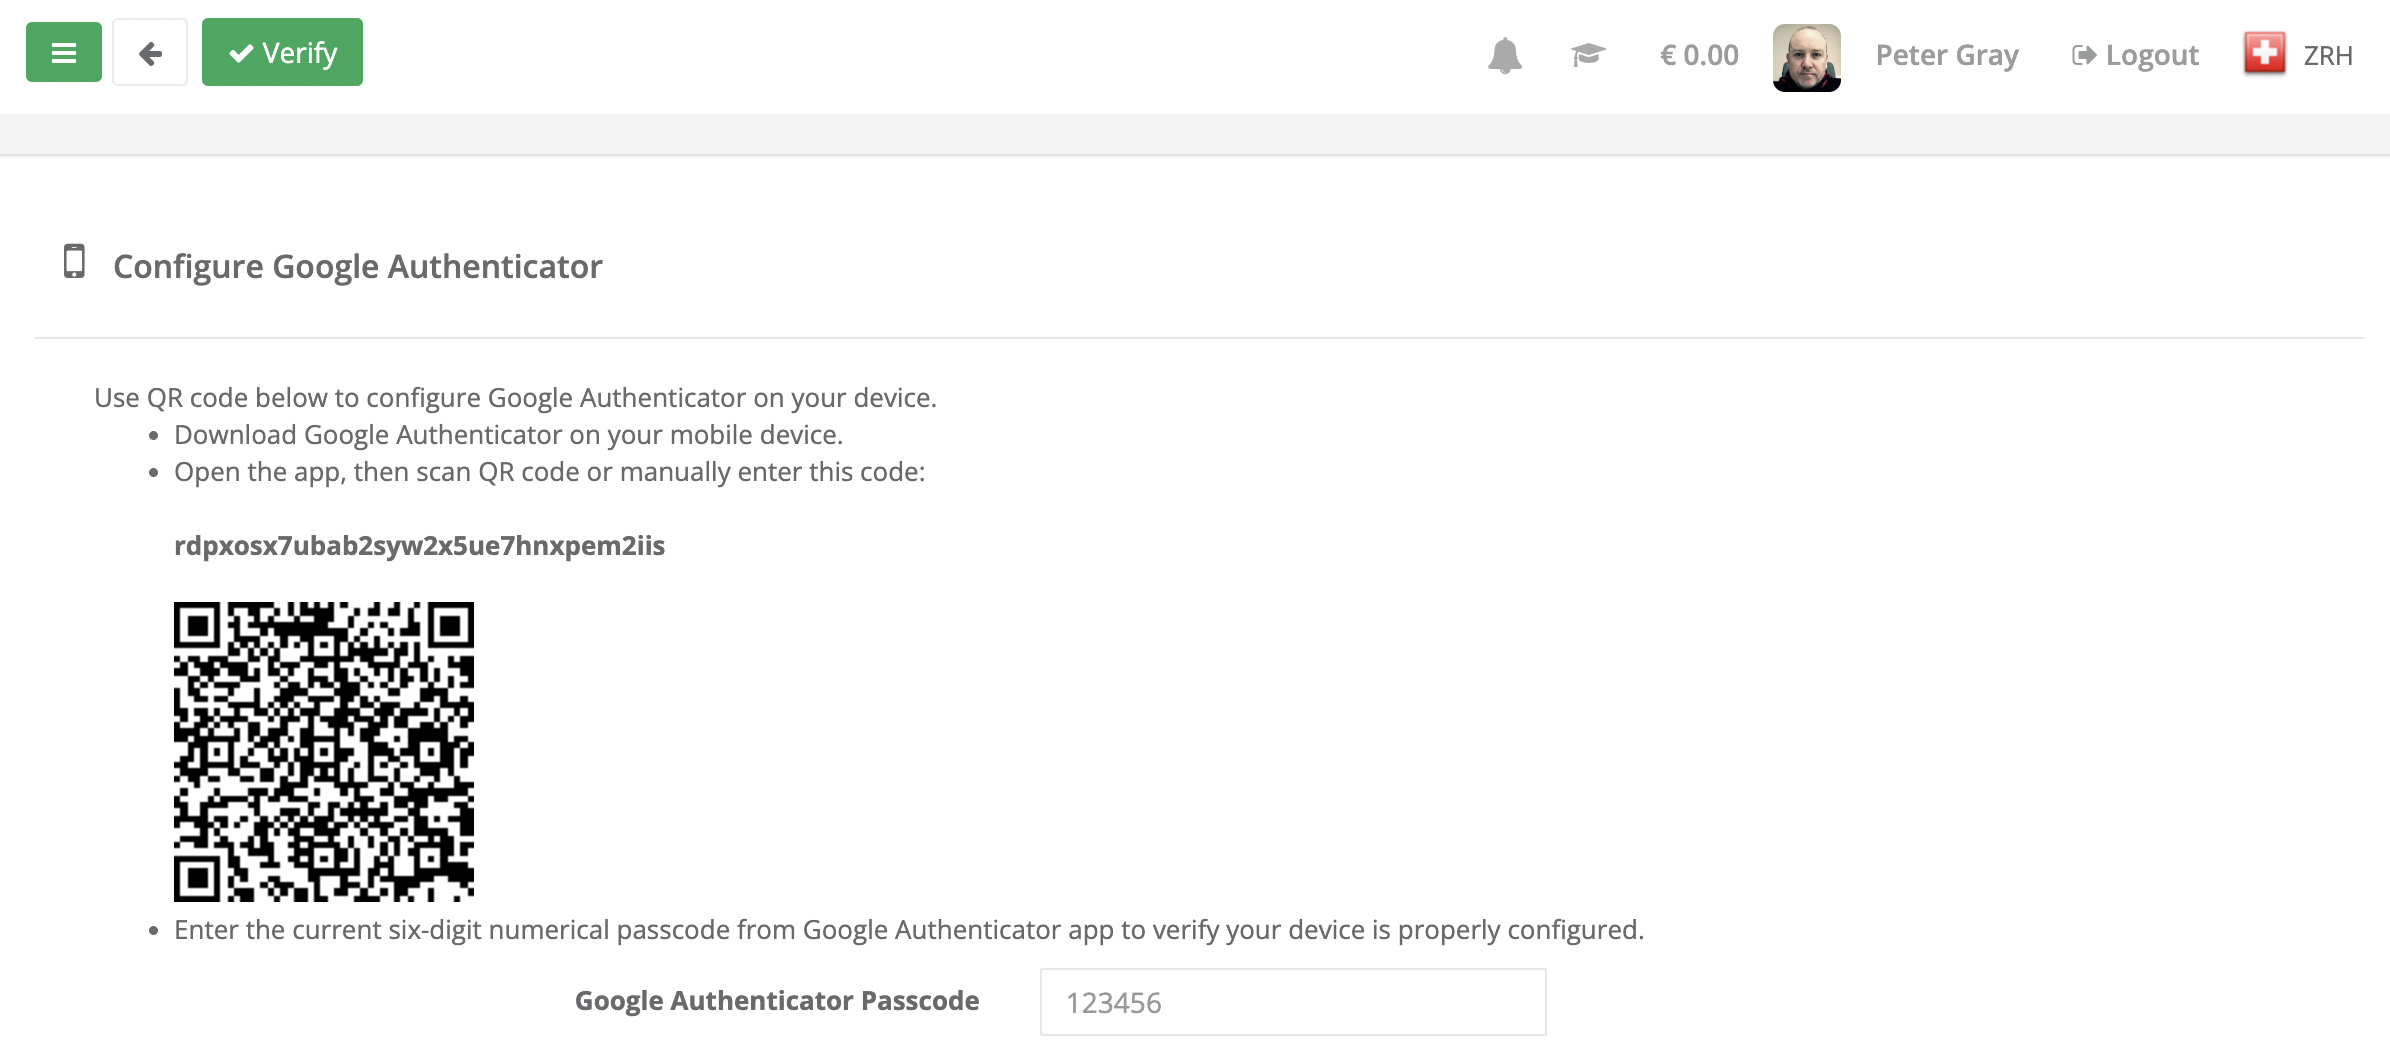
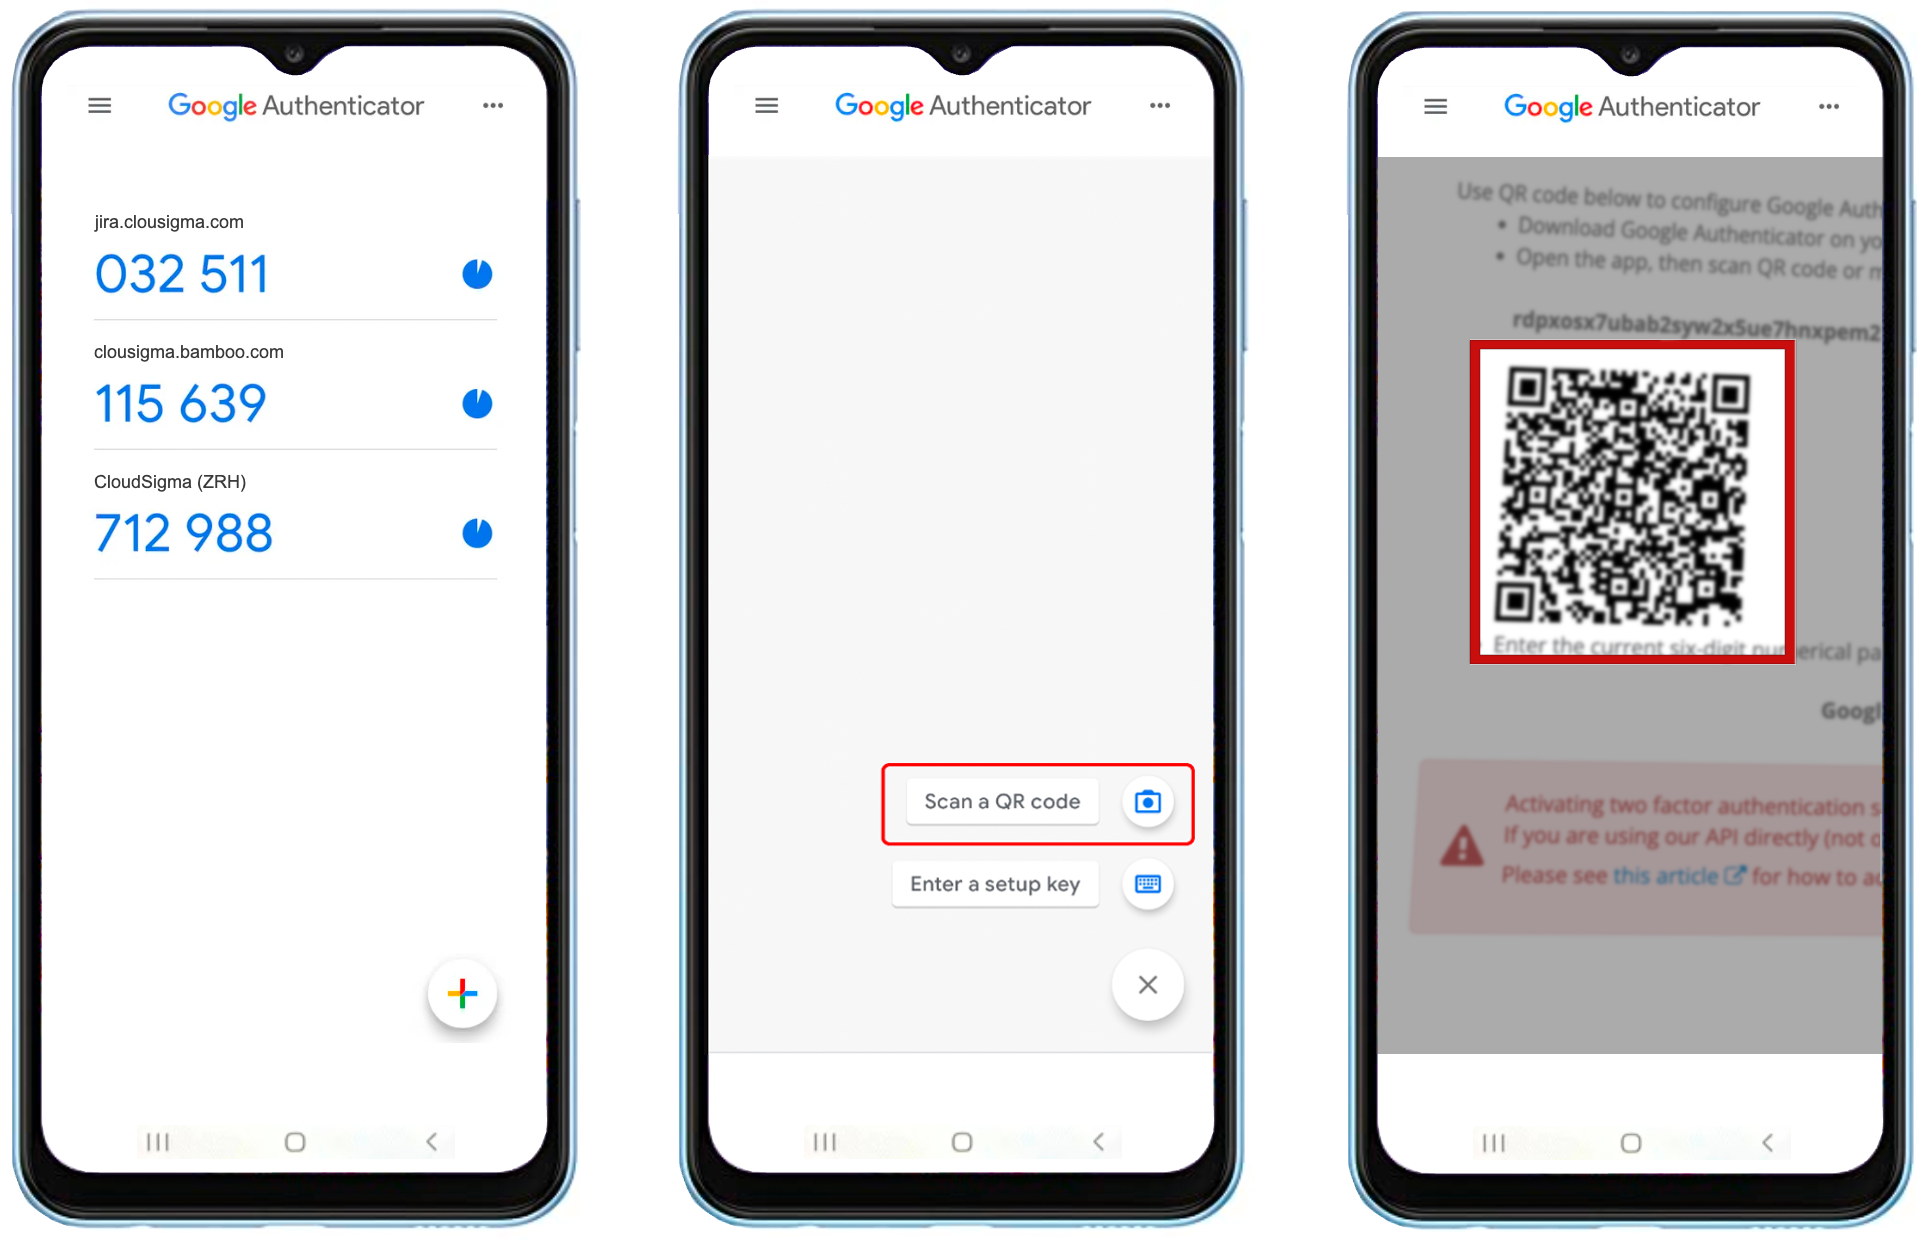
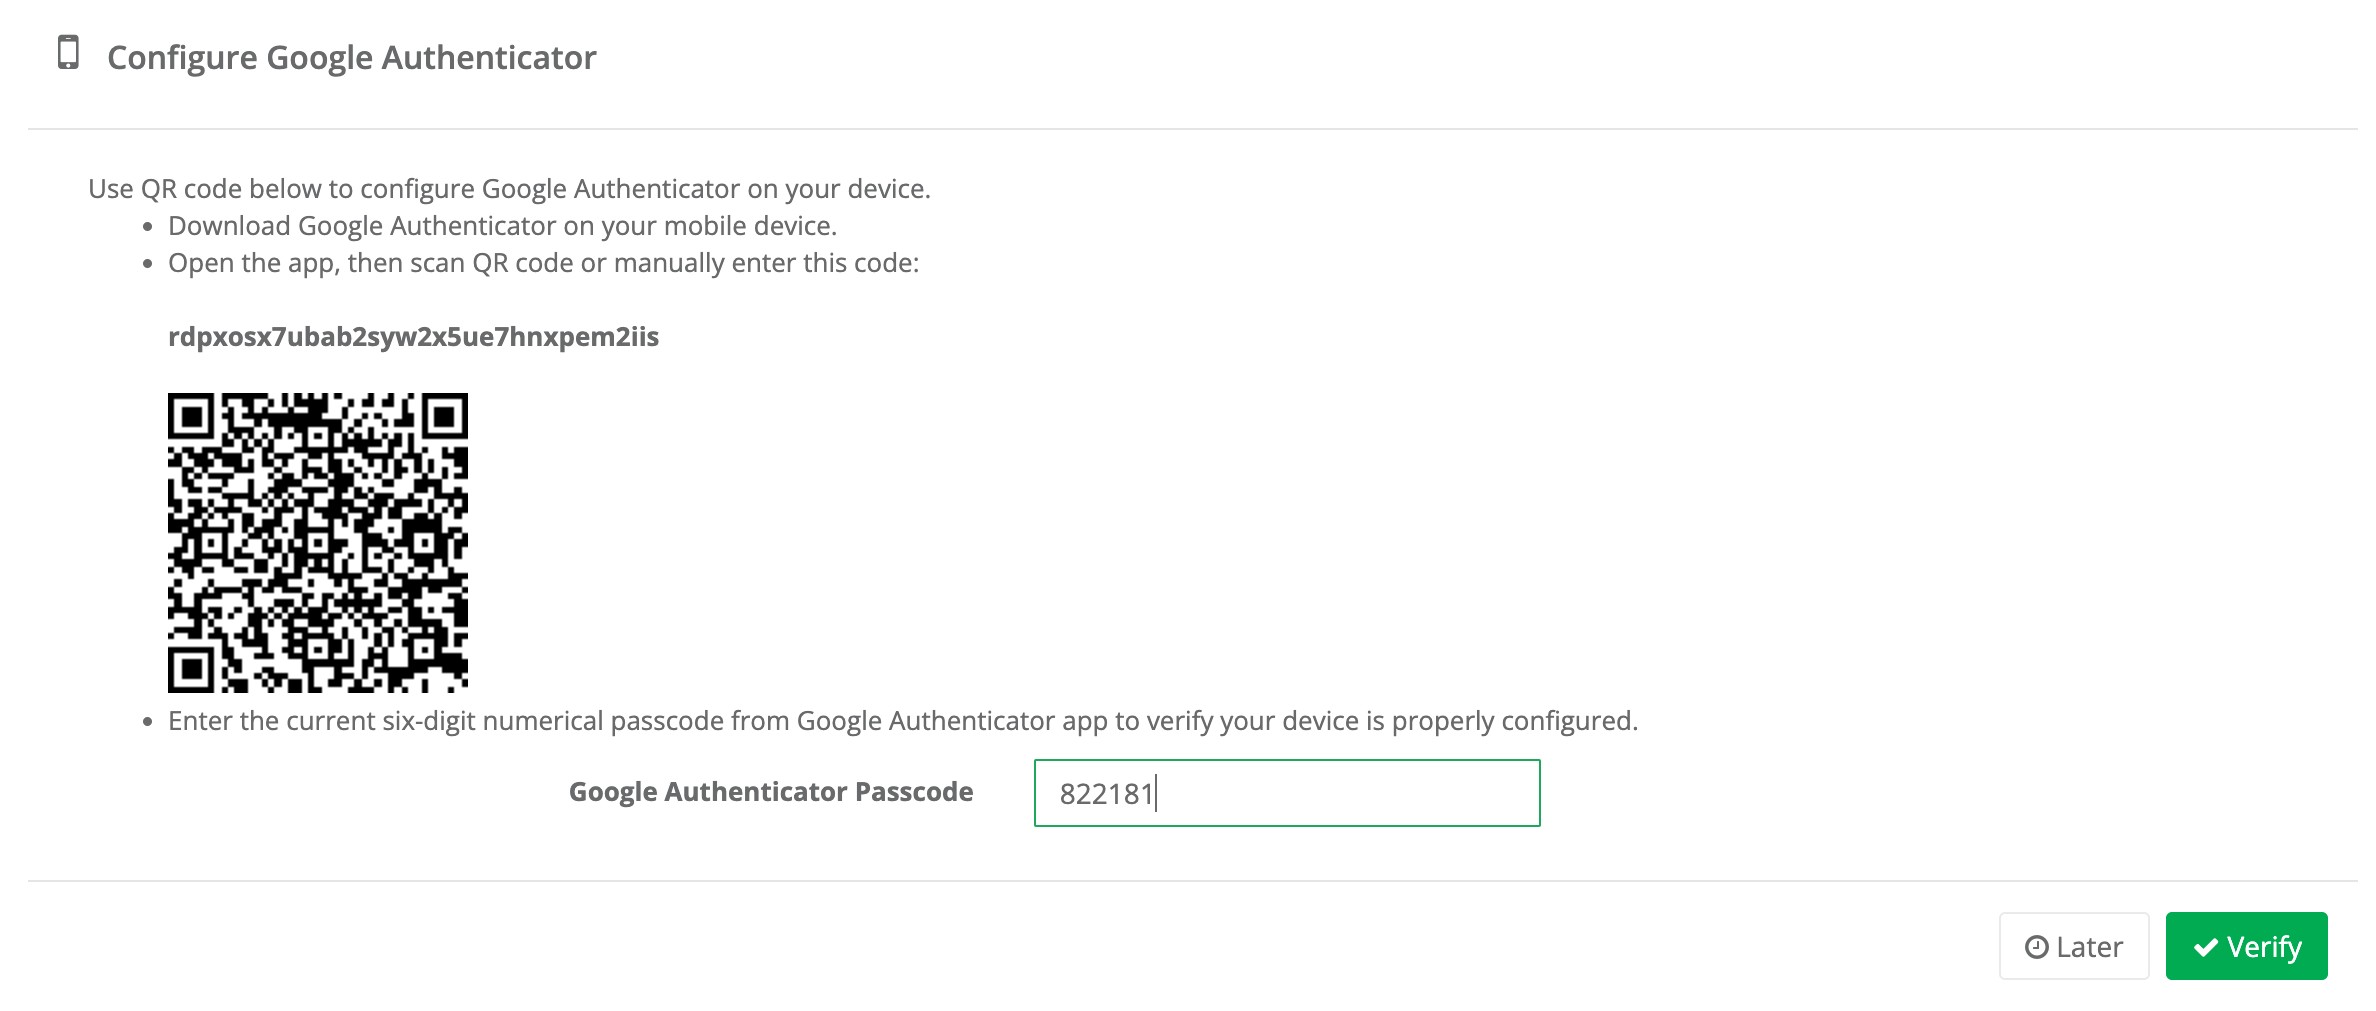
Open Google Authenticator and touch the “Plus” button. Then choose scan QR code and hold the phone up to the QR code presented on your computer screen. The QR will be captured automatically and you will see a new entry in the authenticator app.

So as you can see, this is a very simple process that will give you a much higher level of security for your Cloud Adore power by cloud sigma accounts in terms of access.